
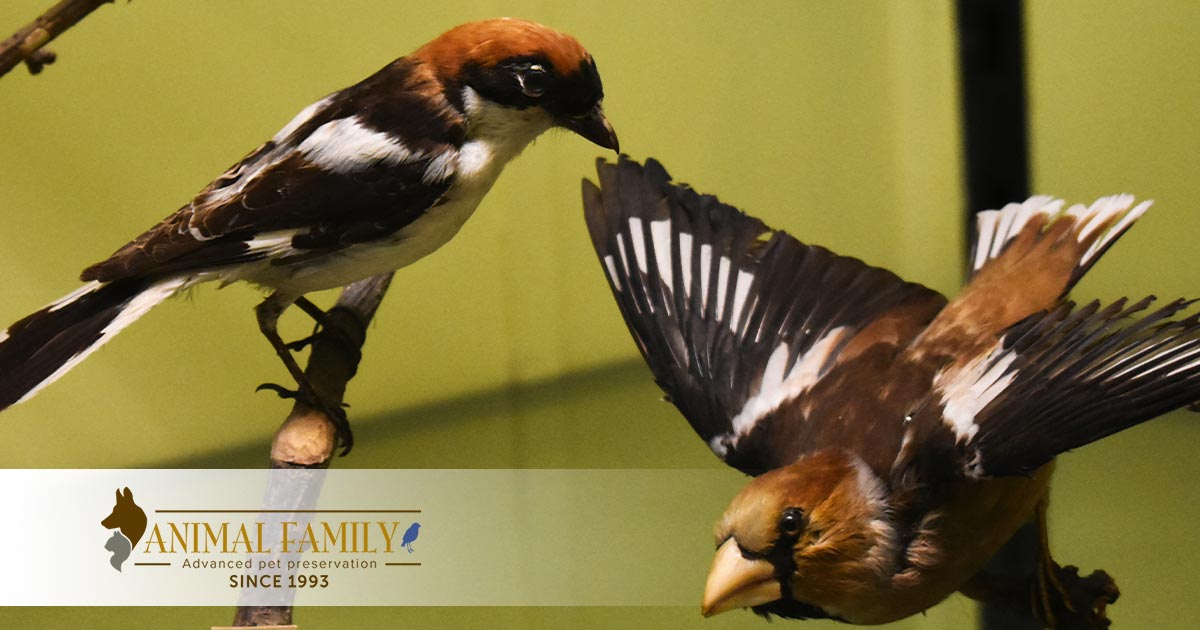
How Birds are Taxidermized
February 13, 2021 3:30 pm Leave your thoughtsA bird can become a beloved family member that leaves an emptiness in the owner’s heart when it passes. When it comes to the difficult time to say goodbye, more people are realizing that there is always the option of taxidermy to help with the process. If you choose to keep your feathered friend with you, or if you’ve come upon a beautiful creature that you want to admire for years to come, here is a breakdown of how to taxidermy your bird.
First, you will need to gather the proper supplies. Here is a quick guide to get you started:
- Borax/cornmeal/non-iodized salt mix
- An easy to bend thin wire
- Hard to bend thicker wire
- wire cutters
- Knife
- Sewing Needle
- Strong thread
- Scissors
- Tweezers
- Cotton balls
- Glass bird eyes
Step 1: Starting the Incision
After gathering the supplies, it is time to get started. The first step is to prepare for the incision. Locate the spot on the back of the bird, just before the head begins, and part the feathers there to expose the skin. Spread the feathers from just below the head to just above the base of the tail.
Start the incision from the base of the tail and cut evenly towards the head, a sharp knife or scalpel is the ideal tool to use for this. Avoid cutting through any feathers and do your best to keep everything dry, as feathers become very sticky when wet. Once the incision is done, clean up the area to avoid any stray liquid from getting on the feathers.
Step 2: Peeling the Body
Peel the skin on each side of the incision towards the wing. It should pull away from the lower membrane of flesh easily. Now it is time to remove the insides of the bird. When working with the innards, make sure to keep the feathers dry. When planning to taxidermy a bird, make sure to start the process quickly. It will become harder to peel as the body sits.
Note: You can keep the skin and innards damp by adding just enough water without getting the feathers wet.
Step 3: Skin the head
Once the organs have been removed, it is now time to skin the head. Separate the bird from the skin. Holding the skin and feathers, pull tight and snip the neck. Be careful to avoid cutting the skin. Take the remainder of the neck and cut off what remains. Again, avoid cutting the skin and feathers. Now it is time to prepare the head.
Take the tweezers and insert them carefully into the head, and slowly remove the brain. It will most likely come out in pieces. Once the brain is removed, you will need to remove the eyes out as well.
Step 4: Skin the remainder of the bird
Starting at the legs, peel the skin away. The bones attached to the thigh may need to be broken but you will want to keep the bones in the legs. Keep the leg skin attached to the remainder of the bird skin. The bones will act as point of strength for positioning the bird. Make sure to clear all the meat out away from the bones.
Step 5: Prepare the wings
Prepare the wings much as the legs. Leave as much as possible to provide shape and strength to the wings. Break them off and let them dry out.
Step 6: Peel the remainder of the skin and snip tail
Gently peel the skin from the neck down the back. Be sure to take extra care around the back as several tendons around the spinal cord will catch and possibly tear holes in the skin. If this happens, all is not lost. You can sew the holes. Try to be as careful as possible. Make sure you start skinning while the body is still relatively warm, as this will allow the skin to peel off more smoothly.
Once skinned, snip the tail while removing as much meat as possible, while keeping it still attached to the rest of the skin.
Step 7: Time to preserve your bird
Lay out the skin and make sure any leftover meat is scraped away. Now is the time to bring out the borax/salt/cornstarch mixture. Sprinkle it inside the body to absorb as much moisture as possible. Disinfect the body by washing the skin with soap and water before adding the mixture. If you are going to preserve the tongue, add the mixture to the mouth as well. Lay the skin out with the flesh side out, and let it dry out for 72 hours.
Fluff the feathers and prep it for the next steps. They will stay the way they dry.
Step 8: Clean up
Sew up any small holes in the skin, and then stuff the body with the cotton balls until you have attained the basic shape of the bird.
Step 9: Time for wiring
Use the thick wire to make a frame around the cotton to make a wing. Stick it through the wings at the wrist from the inside out. Leave at least 2-3 inches of wire sticking out of the wing into the body cavity. You will need to perform this again for the other wing.
If you were able to keep the bones in the legs, wrap the thin wire around the top of the bone, secure, and set aside.
If the bones in the legs are not present or in usable condition, use thick wire and thread it through the leg till it sticks out the foot. Thin wires will spread out the toes. Start at the talon and go back into the foot with the thin wires to straighten out the toes.
Step 10: Bringing it all together
Mash the cotton balls together and wrap them in the thread once they are the approximate size of the bird. Using the thick wire, make a bundle for the head, and make a thinner section with cotton for the neck. Once all is in place, it is time to sew up the body cavity. Make sure there is a bit of tension on the skin to keep everything in place.
Step 11: Time to position
It is time to position the bird how you want it to sit. After it is in position, trim the wires as close as you can without damaging the bird. Paint any feathers that do not look right, then put slightly darker paint under the eyes. Use darker colors for the feet and beak as well. The last step is to add the glass eyes. Use wire and wrap through the cavity, then connect the eyes. Work them into place, so they do not look like they are popping out of the skull.
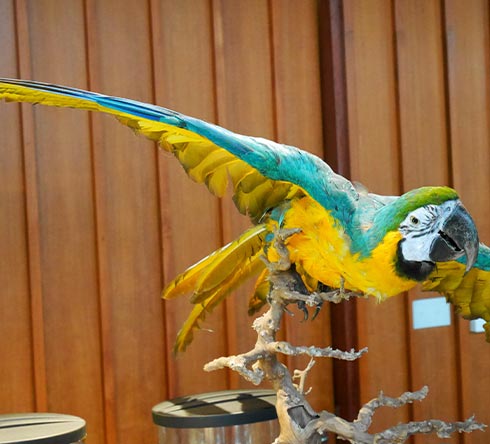
Get Help from the Professionals
If you have recently lost a pet bird and would like to have them preserved by a professional taxidermy and animal cremation service, contact us today at Animal Family Pet Preservation and let us help you through the process. We will create the most realistic, beautiful, taxidermized body available.
Categorised in: Pet Preservation, Pet Taxidermy
This post was written by admin